Friday, August 31, 2012

Corn Bread


Corn Bread!!! I love corn bread. I grew up eating the Jiffy box mix and to this day it's probably still my favorite.  Mostly for nostalgia I'm sure.  Shortly after getting married we invited his brother and wife over for dinner.  Mind you I had not cooked a thing until I was married, so it was very brave of them to accept the offer.  I knew how to make one thing- enchiladas.  Corn bread sounded good to go with it and apparently I didn't know that you're not supposed to try new things out on dinner guests because I went ahead and made it from scratch.  I bought the box of corn meal and followed the recipe on the side.  That evening we were enjoying a lovely time, everyone was being very polite, but there was no ignoring the flat, dense, flavorless corn bread that I set before my guests.  I followed the recipe exactly, what could've gone wrong?  My honey- whom I love dearly- grabbed the box and started reading off the ingredient list.  Check, check, check...yes, I had put in all those things.  Then he started listing things that were certainly not in the recipe...things like baking powder, salt, butter.  I questioned where he saw those ingredients (maybe a little too proud?) "in the second column"  he stated casually.  Oh dear, the second column!  whoops!!!

This recipe is far from flat, dense and flavorless.  I hope you like it:)


In a medium mixing bowl combine the dry ingredients.  Set aside.


In a small mixing bowl combine the wet ingredients.


Stir the wet into the dry, making sure not to over mix.  Place batter into an 8 x 8 buttered baking dish and bake for 15-20 minutes in a 425F oven.


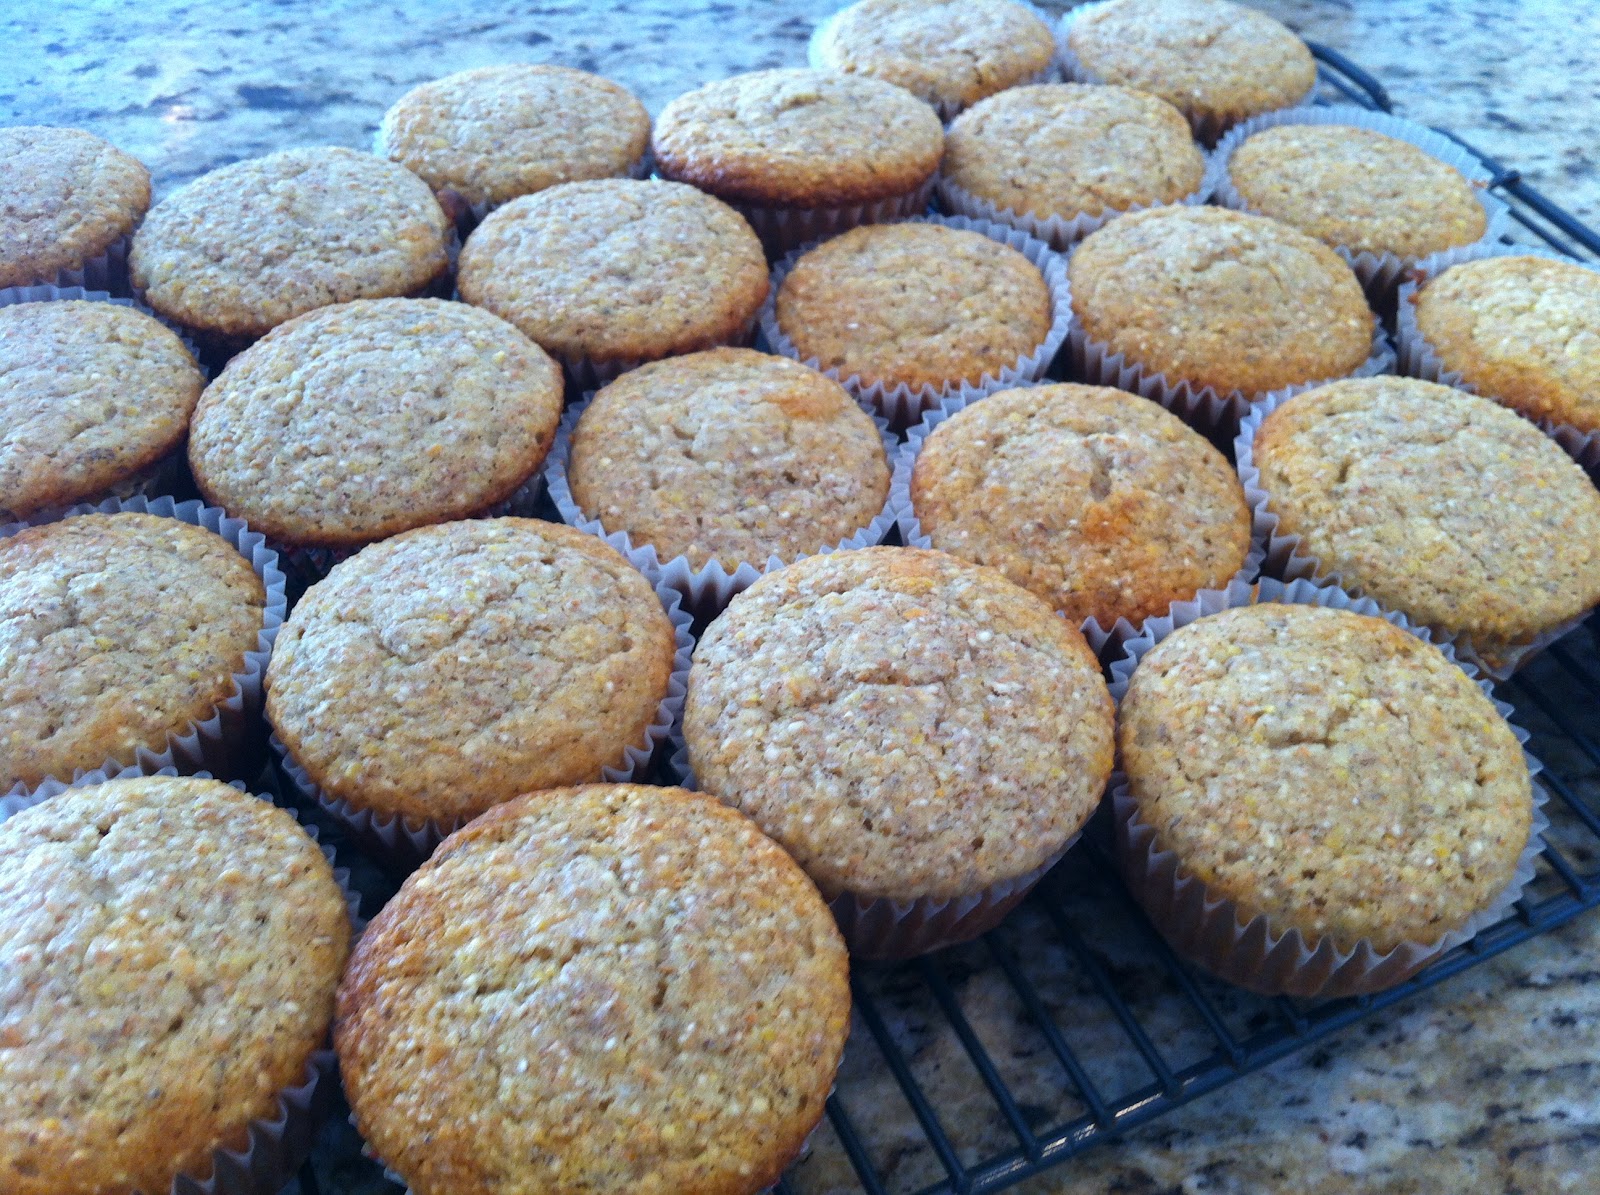
Coming out of the oven, just beginning to brown...mmmmm.  Enjoy

Corn Bread
adapted from Better Homes and Gardens Cook Book

1 c ap flour
1 c corn meal
1/3 - 1/2 c sugar
1 T baking powder
1/2 t salt
2 eggs
1 c milk
1/4 c canola oil

Preheat oven to 425F and butter an 8 x 8 baking dish, set aside.  In a medium bowl combine the flour, corn meal, sugar, baking powder and salt.  Make a well in the center and set aside.  In a small mixing bowl combine the eggs, milk and oil.  Add the wet ingredients into the dry ingredients and stir til moist, not over mixing.  Pour the batter into the prepared baking dish and bake for 15-20 minutes, just til the bread starts to brown and a toothpick comes out clean.


Wednesday, August 29, 2012

Shredded Beef Tacos


We eat a lot of chicken (you may have noticed) and hamburger at my house.  blah, blah, blah.  To get out of that rut I like to make this shredded taco meat for a change.  This cooking method is universal, you can use many kinds of meat in place of beef. Here goes-


I'm starting with a 4lb beef chuck roast, but I always tell the meat man (or woman) how I'm cooking it to make sure I get the right one. Plus they may know something that I don't, give me helpful cooking tips and can steer me in better direction (did you get that? steer.  lame I know).


Anyhoo, 4 lb roast, salt & pepper generously into a large, heavy oven proof pot that has a lid to brown  in olive oil on all sides.


Remove meat from pot to a plate and place in 2 onions, chopped large, with a little salt to sweat the onions.


Once they start to break down place in the garlic, spices and roast.


Cover the roast with tomatoes and the liquid in the can.  I used the very large can from costco, it was just the right amount and cost me $2.65.  I'm feeling a little jipped for every time in the past that I've made this using 14,000 small cans of tomatoes at $1 each:-/  Oh well, live and learn and now I know.

Bring this to a boil, cover and place in 350F oven for about 3 hours.  At 3 hours check the meat.  It should be fork tender, if not stick it back in the oven and check 30m later.


Here it is coming out of the oven.


Once the meat is tender take it out of the liquid to rest and cool a bit.  You won't be able to shred it while it's super hot.  Also, fish out the bay leaves, not yummy.


If you have a stick blender then blend the remaining tomatoes and onions in the pot.  If not, these things are super handy and a great, inexpensive tool to have.  You could also use a blender.


Blend it to your desired consistency.


After the meat is cooled down and ready to handle then, using 2 forks, shred the meat.  It helps to cut it against the grain into big chunks first, then shred those pieces and place on a serving platter.  Serve with the sauce on the side, simple salsa and sour cream.  So good!

Shredded Beef Tacos

4 lbs beef chuck roast
2 onions, chopped large
4 garlic cloves, smashed
1 large (restaurant size) can tomatoes in tomato juice or puree
2 T chili powder
1 T cayenne or red pepper
1 T ground cumin
3 bay leaves

Season roast on all sides with salt and pepper and brown in olive oil on mh heat in a large oven safe pan that has a lid.  While roast is browning preheat oven to 350F and prep onions, garlic and spices.  When roast is browned all all sides remove to a plate.  Add into pot the onions with a little salt.  Let cook down for a couple minutes.  Add in garlic and remaining spices and give a good stir.  Place roast and any drippings back into the pan.  Add tomatoes over roast.  As best as you can give it a stir so the the tomato juice gets into the seasonings and vice versa, it'll be pretty full though.  Bring this to a boil, cover and place in the oven for at least 3 hours or til meat is fork tender.  Remove from oven and gently move meat to a platter and fish out the bay leaves.  Using your stick blender blend the pot juices til desired consistency and place in a serving bowl.  Shred meat and serve with tortillas, sauce, simple salsa and sour cream.  Enjoy!

*note- this recipe can be halved, still cook the meat for 3 hours though.

Sunday, August 26, 2012

Chocolate Coconut Breakfast Bars


This is a recent find of mine from AllRecipes.com and I think it's gonna stick.  It's a bit decadent, but there are so many good things in there that I know we're getting wholesome food, too.


Lot's of protein from eggs and nuts, fiber from whole wheat flour, wheat germ and oats and yummy-ness from chocolate and coconut....mmmmm.


Cream butter and sugar


mix in dry ingredients


Press into a 9x13" pan


Mix eggs with walnuts, coconut and chocolate chips...


and spread over crust


Bake at 350F til edges start to brown, cool on a wire rack.  Enjoy!


Chocolate Coconut Breakfast Bars
from Allrecipes.com

1 c butter, softened
1 c packed brown sugar
1 c oats
1 c ap flour
1 c ww flour
1/2 c toasted wheat germ
4 eggs
2 c chopped walnuts
1 c coconut flakes
1 c mini chocolate chips

Preheat oven to 350F. In a mixing bowl cream the butter and sugar.  In another bowl combine the oats, ap & ww flour and wheat germ, add that into the butter sugar mixture and combine.  It'll be a bit dry, press it into a buttered 9x13 baking dish.  In a mixing bowl beat eggs, add in walnuts, coconut and chocolate chips and mix.  Pour that over the crust and bake for 30 minutes or til edges start to brown.  Cool on a wire rack, then cut into bars.  Enjoy fresh or freeze for later use.

Saturday, August 25, 2012

10 Grain Muffins


I discovered Bob's Red Mill and 10 Grain Cereal when my 10 year old was just starting to eat real food.  Rather than rice cereal or oatmeal I made 10 grain cereal for him and he loved it.  He must still love it because I packed these muffins (recipe from the cereal package) for his lunch yesterday and he not only asked for more but let me know that they were one of his favorites:)  I didn't even have to lace them with chocolate chips, good stuff!


10 Grain Muffins
from Bob's Red Mill

1 c 10 grain cereal
1 1/4 c buttermilk
1 egg
1/2 c sugar
1/3 c butter, softened
1 c ap flour
1 t salt
1 t baking soda
1 t baking powder

In a small bowl combine the 10 grain cereal and buttermilk and let soak while you prep the rest of the ingredients.  Preheat oven to 400F and line a muffin tin with paper liners.  In a mixing bowl cream egg, sugar and butter.  Add in dry ingredients and, with mixer on, add in the buttermilk/cereal mix.  Stir til combined.  Scoop into muffin tin and bake for 15 minutes, or til edges are browned and tooth pick comes out clean. Enjoy:)


Friday, August 24, 2012

Blueberry Muffins


Well, it's been a while since baking day and the cupboards are looking quite bare.  On top of that school is just around the corner, so I must fill the freezer again before the craziness begins.  Today I made blueberry muffins.  I'm still buying local blueberries at the store.  They're super big and super sweet, yum!  I adapted another recipe from the Joy of Cooking(love that book!) that made 24 muffins.  The fam must have liked them because in a matter of hours I was down to 5...yes 5!  Maybe these won't make it to the freezer, but at least they made it where they were intended for:)


I love to use buttermilk when I bake.  It's naturally low-fat and has a better depth of flavor than regular milk that really makes a difference in the final outcome.  Plus, not sure why, but muffins and cakes made with buttermilk are so moist and soft and delicious!


Whisk dry ingredients together and set aside


Add wet ingredients to dry


Fold in blueberries


Fill muffin tins and bake at 400F for about 15 minutes.  Enjoy while still warm or freeze in a ziploc freezer bag for later use.

Basic Buttermilk Muffins With Blueberries
adapted from the Joy of Cooking

Whisk together in a medium bowl and set aside:

1 c ap flour
1 c ww flour
2 T wheat germ
1 T baking powder
1/2 t baking soda
1/2 t salt
1/4 t nutmeg

In a small bowl whisk together:

2 eggs
1 c buttermilk
2/3 c sugar
8 T canola oil
1 t vanilla

Add wet ingredients to dry ingredients and stir just til moist, do not over stir.  Fold in 1 1/2 c blueberries.  Scoop into lined muffin pan and bake at 400F for 15 minutes. Enjoy:)

Saturday, August 18, 2012

Bridal Shower


It's raining today, so I'll share with you a bridal shower I threw for my niece recently.  I can't believe she is old enough to be getting married!  She was my flower girl many, many years ago and has grown into the most lovely young woman.  It was so much fun to do this for her, love that girl!

The wedding colors are hot pink and sunshine yellow, so I planned the menu and decor around those colors.


I served a mixed green salad with mandarin oranges (a favorite of the bride) and marinated red onion, couscous salad with zucchini and cherry tomatoes and a simple fruit salad with citrus dressing.


dessert included lemon bars


and red velvet cake with cream cheese frosting


to send away with the guests I made "A", "E" & heart sugar cookies, the bride & grooms initials


beautiful flowers everywhere for this girly girl


I included a pretty piece of paper in the invitations with instructions for the guests to include a family recipe for a cook book for the new bride.  


Most women do not love games at a shower, myself included.  But I wanted everyone to know a bit of the happy couples story.  So I made a questionnaire and Em got to answer the questions and add in the fun details.  It was so fun to watch her share her story!

*thank you to my good friend Dawnelle for taking these beautiful pictures and allowing me to enjoy the party:)


Thursday, August 16, 2012

Dinner Rolls


Making my own dinner rolls is a perfect example of why I started cooking from scratch.  Reason #1- there are so many extra ingredients and preservatives in store bought bread, it's just not necessary; reason #2- it's so inexpensive to make your own its kinda ridiculous! Now, I have to tell you that I stumbled my way through learning how to make yeast bread, so I probably don't do it "right".  If you have any tips I would love to hear them!  But, this is how I do it and my family seems to like them pretty well:)

I've tried many recipes from cookbooks and online and the one I always go back to is from The Joy Of Cooking- Fast White Bread.  I tweaked a few things to our liking, of course:)


Begin with 4 cups of bread flour (don't try ap, it won't work), 1/2 cup sugar, 2 packets or 4 1/2 teaspoons yeast, 2 1/2 teaspoons salt in a large mixing bowl.  Give it a stir.


Add in 2 cups very warm water (115-125F) and 1 stick melted butter.  Mix on low til fully combined.


Continue mixing on low and add in 1/4 cup at a time 1 1/2-2 cups bread flour.


You'll know you've added enough when the dough stops absorbing the flour.


At this point switch your mixing blade to the dough hook and knead on low for 10 minutes.  My dough likes to climb up onto the top of the dough hook, so I spray the top of the hook with Pam before I switch it out.  While the dough is being kneaded heat your oven to 175F and prep a large bowl by spraying with Pam.


After 10 minutes transfer the dough to the bowl....


...and loosely cover with plastic wrap (also sprayed with Pam), place in the oven, turn the oven off and close the door.


 Let the dough rise for 30 minutes, or til the dough doubles in size.  I think I need a bigger bowl:-/


With a little flour spread on the counter plop the dough out and poke it down with your floured fingers.


Fold it over on itself a couple times...


then cut it in half with a bench scraper.


Set one half aside and cut the other half into small squares.  They should be about the same size, but it doesn't have to be perfect.


To form the rolls take a square, pull it over on itself- kind of like you would turn a sock inside out (does that even make sense?), then start to pinch the bottom as you gather so that you end up with it looking like a balloon, round and full with a little tab on the bottom.


Take the balloon and lay in on the counter in a small amount of flour and with your hand around it roll it in a circle until it becomes nice and round.    


Flip it over and do the same thing, tap off any excess flour...


...place in a buttered casserole dish (you'll need high sides to get the rolls to rise high).  Now do that like 30-40 more times til all the dough is gone and your pan is full...


...like this.  You can see the rolls on the left have started rising already:)  Loosely cover with plastic wrap (sprayed with Pam) and place back in 175F oven.  Turn oven off and close door.  Let rise for 20 minutes.


Remove from oven and place on top while you preheat the oven to 375F.  The rolls will continue to rise while the oven is heating up.


You know they have risen enough when you slightly poke the dough and it doesn't bounce back very quickly.  You can see my finger print on the 2nd roll up.


Once this happens brush the rolls with melted butter and place in oven for about 20 minutes.  I began to check mine at 15m, today they baked for 25m.  It can vary each time though.


Once rolls are nicely browned remove from oven and let cool in the pan.


When they're mostly cooled you can remove to a wire rack and/or pull apart for eating, enjoy!


Dinner Rolls
adapted from the Joy Of Cooking- Fast White Bread

4 c bread flour
1/2 c sugar
2 pkg (4 1/2 t) active dry yeast
2 1/2 t salt
2 c warm water (115-125F)
1 stick butter, melted
1 1/2-2 c bread flour

Combine 4 cups bread flour, sugar, yeast and salt in large mixing bowl, stir.  Add in water and butter and mix til well combined.  Continue mixing on low speed and add the 1 1/2-2 cups bread flour.  Knead with a dough hook for 10 minutes.  Place in a large bowl that has been sprayed with Pam.  Cover loosely with plastic wrap sprayed with Pam and place in a warm place for about 30 min, til dough doubles in size.  Punch dough down and shape into rolls.  Place in a buttered casserole and rise again for about 30 minutes.  Brush rolls with melted butter and bake at 375F for about 20 minutes.  Let cool in pan before pulling apart.